Sunday, September 1, 2019

My favourite sculpts: part 1


I felt like reminiscing over my past achievements as a sculptor, that’s actually the only reason for this topic. 

A long time ago I wanted to up my sculpting game. I had been sculpting Chaos Dwarfs and other stuff in the 90’s feel of miniatures, strongly influenced by the Herohammer style of miniatures.

However I just painted an Ilyad miniature based on the Black Moon Chronicals that really impressed me a lot. The mini in question was the Ilyad Snow Troll (example here is painted by James Wappel).


Especially the chain mail was so fine and realistic, simply amazing!

So i wanted to sculpt a Chaos Dwarf (like, what else right!?), whilst pushing my sculpting skills to the limit. Aditionally I just discovered Procreat, a sculpting medium that allows for a sharper finish than regular green stuff.

So off I went, i based the helmet of a drawing my talented brother made for me and the overall style is further influenced by the Roman/Greek armour of the time (yes, I had just watched the movie 300).


As you can see the bulk of the model is still made with greenstuff, this is because i prefer greenstuff for the more organic shapes. I wanted him to have a Greek style chest plate that mimics muscle tone, and i wanted a 300-style cape/mantle, so thats why I started with greenstuff.

Now it was time to start adding details and this is where the Procreate comes into play. Luckily the two mediums combine very well together. So started adding the beard, basic armour plates and the right hand gauntlet. I wanted the gauntlet to look almost dark elf like, sharp and menacing. This I could not imagine doing with greenstuff. Also I wanted to do realistic chainmail, with real rings. Eventhough the chainmail looked cool in real life these rings would have been really huge. Thats the difference with sculpting a 2.5cm figure as opposed to a 12cm tall Snow Troll


Eventhough the helmet was already done, I could now use the Procreate to sharpen it up a bit and make it less organic in appearance and additionaly complete the armour. The monstrous dog was added because I really wanted to add as much to figure as possible and again push my sculpting a bit further.


For the whole WIP thread, see here:

The mini found it's home at my friend Clam, who has casted it, so if you want one have a look here:

And Clam had him proffesionally painted by Mikkel Nyboe:

StormCast interview with Aly Morrison

Great interview with info on Marauder and specifically Chaos Dwarfs. I learned for instance that there is only one Chaos Dwarf that is not based on an existing Chaos Warrior: Cousin It!

https://www.youtube.com/watch?v=5ivybQCK-9I

Skip to 20.40 minutesfor Marauder
Skip to 23.19 for Chaos Dwarfs


MM 90 painting countdown 14

It's been a while (more than a year actually, sorry Clam...). But many life changing events further and we are back on track!

Figuring out the paint scheme was a b!tch i couldn't find any proper pictures so I only had the Marauder catalogue page for reference....

Here is number 14, basically Slambo but with hammers, so lets call him Hambo!


Here the group all together, twelve in total, so halfway there I guess!


Tuesday, August 27, 2019

Filling Aly's gaps, part 2


So a while back I started sculpting the missing chaos dwarfs from a cut and paste sheet from Aly’s scetsch book. See this link:

https://evillittlebuggers.blogspot.com/2018/04/filling-alys-gaps-hmmm-that-came-out.html

Now i have finsished numbers two, three and four.

Number two is based on the crouching axe wielding warrior. And i get why Aly never sculpted this guy. Trying to pose a fully armoured human sized warrior is a challenge, let alone trying to do this with a dwarf, lacking knees and almost no arms to speak off. Anyways I managed to crank something out:


And then off to number three, a mini version of Slambo. Although officially this one was not on Aly's sheet of warriors, see my previous link and this blog:

http://eldritchepistles.blogspot.ae/2016/01/aly-morrisons-marauder-miniatures.html


I just felt that Slambo deserved his own mini-me. We have a double hammer wielding Marauder Chaos Dwarf, but we needed a proper one with axes and nobody wants to cut up original Marauder Chaos Dwarfs, now do we!? This mini almost sculpted itself it went without thought, as if Hashut himself guided my sculpting tool in order to get this tribute to one of the most iconic chaos miniatures done.


Number four is the scythe wielding warrior. Again due to lack of reach of those tiny dwarf arms combined with their fat bellies, I had to improvise on the pose a bit. I went for a horizontal scythe hold instead of a diagonal hold (yes Clam, it's going to suck to line them up). Lovely minature to sculpt, I added the croissant horn later, just to pay more tribute to the original minature. This was my first time sculpting chain mail gloves and my last, and i hate them, wouldn't be practical in combat and they look stupid...


Group shot and a shot where they are amongst the original Marauder CD's to show off size and style compatibility.

And the size comparison shot:

Two more are in the making, update to follow soon!


Tuesday, May 8, 2018

MM 90 painting countdown 15

So after Clam beating me to the punch in finishing his work the last two rounds, this time I took home the prize and finished first. It was Clams turn to choose the subject for this round and he chose MM90/2A:


Clam already dubbed him Hunchback, Quasimodo, so ill just call him Modo for short.


Straight forward green, blended highlight, ginger beard nothing fancy, few simple freehands on there.


Anyways, pictures;


The comparison:

Monday, April 30, 2018

MM90 painting countdown 16

So here is our next subject: Dauger. After the alleged man in the Iron Mask WIKI.


I have two samples of this miniature but both are very soft on detail, so I had to do some repairs.


So here you have it Clam, lets get it on!


Small update, not there yet, but getting there for sure!

And Clam beat me to punch again, basterd...
He did a great purple version, but same like me this mini is terrible. Probably the worst in the range, details are soft, nothing on the mini of any interest, bland and boring... anyways the final product:

And a group shot, I've put him at the back, so we don't have to look at him too much, damn ugly Dauger...


Thursday, April 26, 2018

MM90 painting countdown 17


So, Clam chose to go with mr. Big Ears (whom I dubbed Smith, after Will Smith because of the ea... ah well you got the idea) for the next challenge, and boy was it a close call. He managed to post his completed picture just minutes before me. I actually already finished Thursday evening, and was just checking out the CDO forum, and BAM, this Mr. Lamebeard had his completed work up already, even though he assured me that he would be busy and wouldn't have time to paint until Friday, basterd, can't trust a chaos dwarf now can you  >:-)

Anyways here is Clams attempt:


And here is my finished puppy.


It was a great mini to paint, I really focused on the big ears, because they draw all the attention.
And a group shot just for fun:


Saturday, April 21, 2018

MM90 painting countdown 18

So this was a rather quick one, just plain full body armour bronze. I put a lot of highlights in there but it doesn't really show on the picture. Since I didn't have bronze I went with a mix of gold, brown and touch of black, highlighted by adding silver.


My good friend Clam dubbed him Miley Cyrus, because, obviously, the wrecking ball. I liked that reference but will keep it simple and just name him Cyrus, sounds a bit more manly also, and I don't want to hurt his feelings...


By the way this is my favourite of the MM90's so a bit sad that I had to paint it in such dull colours...


And a group shot of the work so far:


And the results of the battle so far, mine on the left Clam's on the right:


Wednesday, April 18, 2018

Press casting shields (Scibor style!)

Alright, for my MM90 painting project I will need a lot of Marauder style shields. Fortunately I do have a few originals, but I don't have any of the coffin lid shaped ones. These are the original ones made by Marauder, they are the same shields used for their undead line of miniatures:


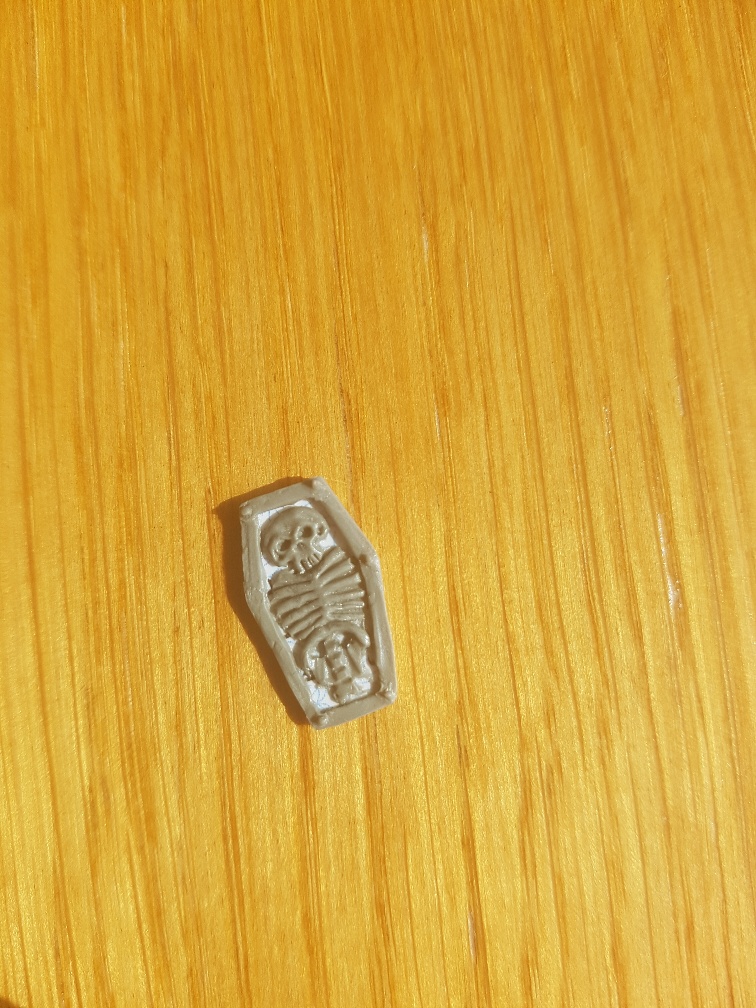
On ebay I found a lot of the round ones with a Bat and a Rat, so I have plenty of those now, but I decided would sculpt some coffin ones.
Here's the start, a coffin lid shaped piece of plastic and then adding the details with putty.


What I learned was, that next time I will start with the rim edge and then add the details in the middle, because it was really hard to make the rim nice and straight due to lack of room and access, ah well, we live we learn.


Then I took the finished product, lightly brushed it with Vaseline and created a shell of putty around it making sure it was pressed firmly around every little detail.


After the shell was dry, I brushed the inside again with some Vaseline and then pressed a blob of putty into again making sure it filled all the details. Let it harden and then, voila, a duplicate of your shield design!


Sunday, April 15, 2018

Tutorial; making tiny frikking rivets.

So recently I repaired two chaos MM90 Chaos Dwarfs that were mutilated, FUBAR:
http://evillittlebuggers.blogspot.ae/2018/03/repairing-two-mm90-chaos-dwarfs.html


And for this repair I had to sculpt 9 of those ietsiepietsie teenieweenie little rivets that are used on all the MM90 Chaos Dwarfs. I did the free style by placing a small bit of putty on the spot and then trying to get it to stick and shape it into something roundish.


This was frustrating and time consuming, I needed to find a better way. I tried a fineliner pen with the tip taken off but these rivets were too big and left too much putty around the edges. Fine liners are great for making indented rivets but not for protruding rivets.


Now I'm in the process of sculpting several Chaos Dwarfs that will need a sh!tload of the pesky tiny rivets, no a very tempting prospect. See here:
http://evillittlebuggers.blogspot.ae/2018/04/filling-alys-gaps-hmmm-that-came-out.html


So I had to come up with something to make this process easier, so I made a tool:


I used an old pen, made a tip out of putty and then used a needle to make a small hole in the middle of the new tip. I then covered it with superglue to make it a bit sturdier (putty is quite flexible). So why is this better then a fineliner, I hope this illustration explains that:


Where the fineliner will make a nice round rivet, it is however too big and it will leave a lot of putty remaining around the edges at the same height as you want your rivet to be. The tool I made will flatten the putty around the rivet, making it easier to smooth it into the surface and with a lot less residual putty.


So how to use? The best I way I found was to roll a bit of putty out and while holding it on the spot where you want the rivet, you push the tool onto the putty, but don't forget to lubricate the tool or the putty gets stuck to the tool:


The second picture shows me pushing it down on the table top and not the miniature but that's because I only have two hands, one of which had to hold a camera, but you get the idea. After you push the tool down pull the putty away.


And voila, you have a perfect tiny rivet, smooth around the edges a bit if needed, but that's it!

We are still up and running!

Hey all, as this is not a business venture but more of a service venture for the true old skool chaos dwarf fans, I am not actively promotin...